The Virtualizor's automatic reinstall option does not allow you to modify or create a custom partition. However, you can create such a partition through a manual installation/reinstallation of an OS. You can follow these instructions to manually install/reinstall an OS.
1. Log in to your Virtualizor Control Panel.
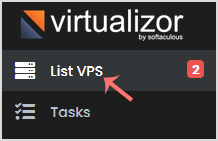
2. In the left side panel, click on List VPS.
3. Hover your mouse on the appropriate VPS, and that line will be highlighted. Then click on the Manage icon in the highlighted line.

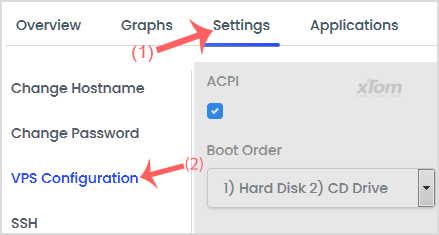
4. Click on the Settings tab and then choose the VPS Configuration option.
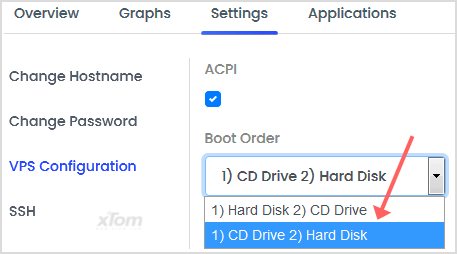
5. Under the VPS Configuration option, change the Boot Order to (1) CD Drive (2) Hard Disk.
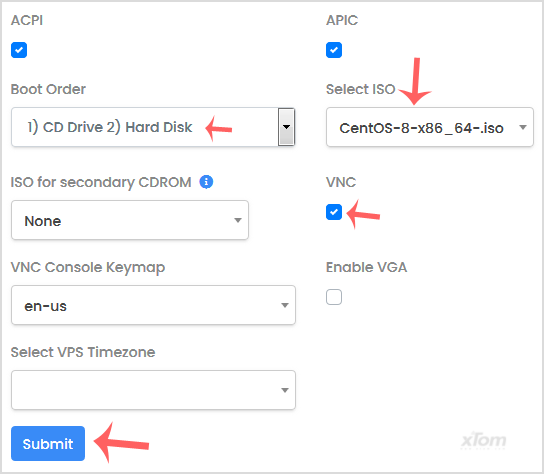
6. Under Select ISO, choose your ISO from the dropdown list. Ensure that VNC is enabled, and you can leave other options as they are. Then click on Submit.
7. Reboot your VPS by clicking on the Reboot icon.
![]()
8. Now, quickly tap on VNC without waiting.
![]()
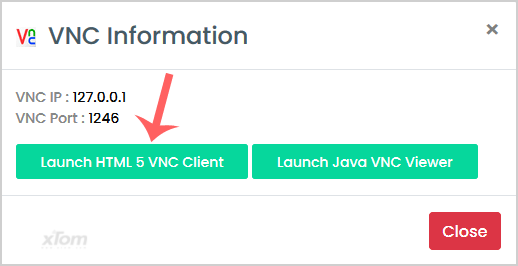
9. The new Popup box will open. Click on HTML5 VNC Client.
Most operating systems will ask you to press any button to start an OS installation while booting. You need to press any key on your keyboard when asked, and the OS Installation/Reinstallation will begin. It may also show you an option like Install OS or Test this media. For OS Installation/Reinstallation, you need to select Install OS and press the enter button.
Once the installation begins, while setting up the OS, it will ask you to create partitions, set-root/admin passwords, etc.
After the installation is complete, do not forget to set your VPS Boot Order to (1) Hard Disk (2) CD Drive. Otherwise, it will reboot your VPS and start in installation mode instead of normal mode.
Note: If VNC got disconnected, then click on Connect to reconnect it.